
Newsletter:
A Day in the Life…
1.
Use the ENTIRE page for the newsletter.
The newsletter can be 1 page in length.
2.
Margins: .75” for all
(left, right, top, bottom)
3. Create a nameplate. The height of the nameplate is not more than 1 ½”. Included in the nameplate: name of newsletter, your name, date, version, word art. (blue binder: 16, 17 or book: 145, 149)
4.
The number of columns in your newsletter is 3.
5.
Include a subheading for each story.
The subheading cannot be the name of the class. Each
heading must be formatted the same.
6.
Write individual stories for each class you take.
Do not write about lunch, TEAM, study hall, or being a teachers aide.
Write about what you do educationally in your class.
Don't write about not liking the class or if you don't like the teacher. You will need 4+ sentences for
each story that you write. You do
not have to write the stories in the order of the day.
Use complete sentences, proper grammar, punctuation, etc.
THIS WILL BE EVALUATED!!!!! Use
the same text style for every story. The
font size for the stories should be 12.
7. Include a picture for every story. Pictures cannot be larger any 1”. Pictures must be appropriate for the story. The wrapping style for the pictures is square or tight and MUST be place in the CORNER of the story (text)....not the middle. Pictures can come from clip art or an internet search. (p. 149 - carrot or boy picture)
8. A border must be somewhere on the page: page border, column, or paragraph.
9. Do not use the following words (or forms of the word) when writing:
| a lot | thing(s) | stuff | like |
| boring | nothing | 'cuz | 'cause |
| it | stupid | dumb | its |
| but | kind of | ok | bunch |
| sort of | lots | sucks | hate |
Version 2 - Add the following to the newsletter you have already created.
Save the newsletter as "Newsletter Version 2".
1. Change the version/issue to 2 and change the date
2. Change the column layout to 2 columns.....not 3 columns.
3. Select 3-4 pictures to keep and remove the others.
4.
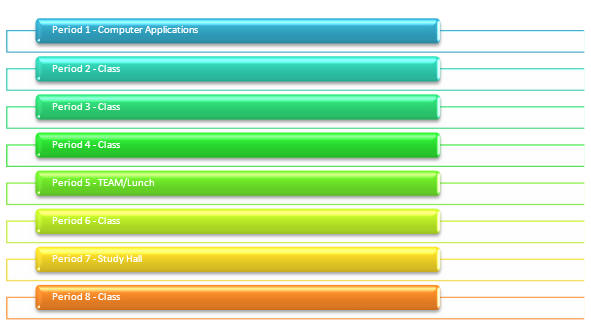
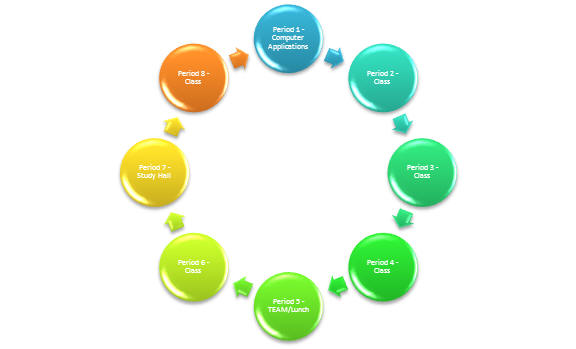
Create a "Smart Art" shape that contains your class schedule. Above the
shape, include a heading "My Class Schedule". You can pick from the
following shapes: list, cycle, pyramid. Make sure the shape fits
your needs. Include all periods of the day in the schedule. Change
the color of your smart art shape. Size it so that it is about ? inches
big.
My Class
Schedule
My Class Schedule


5. Place the schedule BETWEEN two
stories. Rearrange text, pictures, columns breaks etc as
needed.
6. Print - but do not print until instructed to do so.
Version 3 - Add to the newsletter you have already created.
1. Save as Newsletter 3
2. Change the Version/Issue number and the date
3.
Create a Subheading that says Computer Applications. Type this paragraph
of text:
There are ? students in my Computer Applications class. The chart below represents a break down of the students in my class.
Create a chart: column-clustered or bar-clustered. Add an appropriate chart title, horizontal axes and vertical axes labels. Format the axes. Move the legend to the bottom. Apply chart style #6. Change to color of your choice.
Highlight the subheading, paragraph, and chart and place it in a text box. (p. 144, 149) Format the text box with a shape effect of your choice. Add a shape style color of your choice. Size the text and chart so that it fits in between two stories.
4. Get a quote from a teacher that you have a class from. Include the quote as a “pull quote” in your newsletter.
The Importance of ________
_____ is my _____ teacher. I asked her/him why art
is an important class to take.
"Put the quote here. Put the quote here."
5. Print - but do not print until instructed to do so.